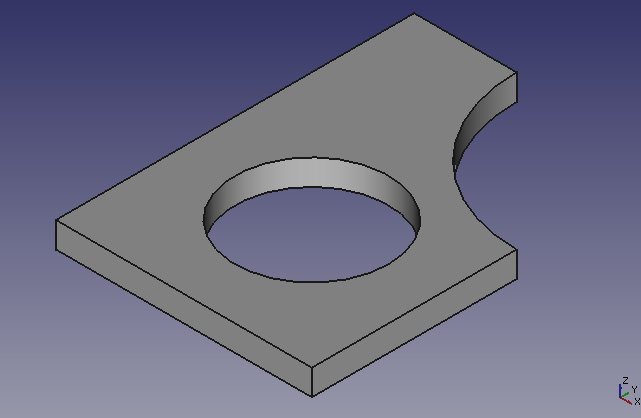
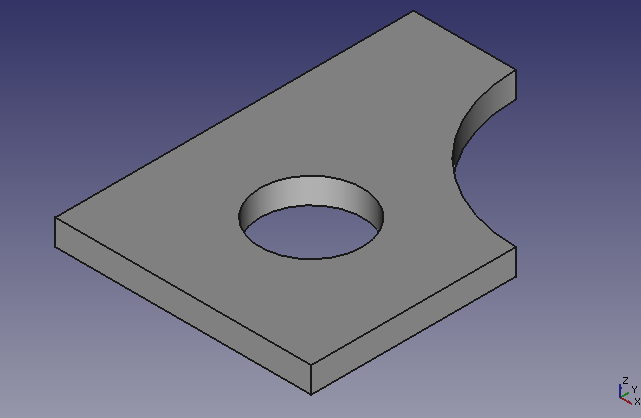
FreeCAD 操作を Python スクリプトとして記録してコマンドラインから実行する
FreeCAD で行なった操作を Python スクリプトとして記録してコマンドライン版 FreeCAD である「FreeCADCmd」で実行する方法について説明します。
形状を変更するための Python コードの確認
FreeCAD での GUI 操作は Python のソースコードに変換された後でそのソースコードを実行することで実現されます。そこでまずこのソースコードを確認して、行いたい操作がどのようなソースコードになるのかを確認します。
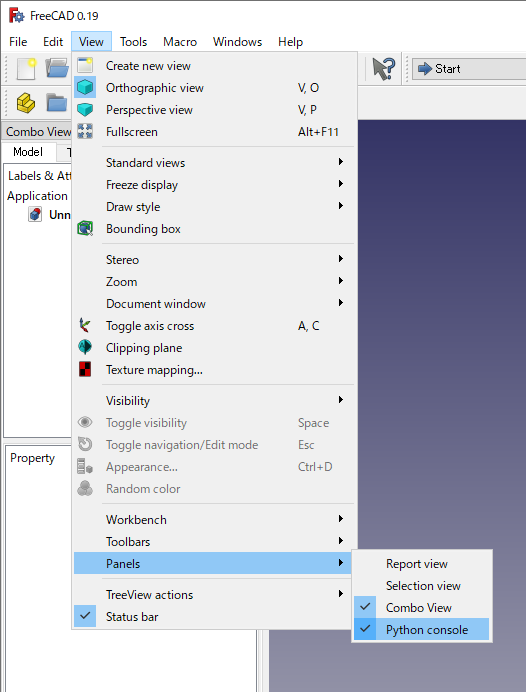
メニューの [View]-[Panels]-[Python console] を選択し、Python コンソールを表示します。
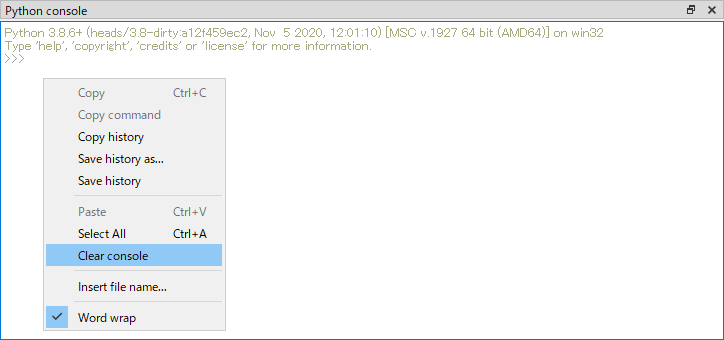
表示された Python コンソールを右クリックし、「Clear console」を選択して表示されているソースコードをいったん全て消去します。
GUI を使用して通常の手順で形状変更を行います(実際の FreeCAD ファイル)。ここでは例として以下のような形状が保存された FreeCAD ファイル(フォルダ「C:\Test」に置かれたファイル TestShape.FCStd)を読み込み、中央に空いた穴の半径(スケッチ Sketch001 で定義)を 15mm から 10 mm に変更し、別名「TestShape-changed.FCStd」として同じフォルダに保存します。
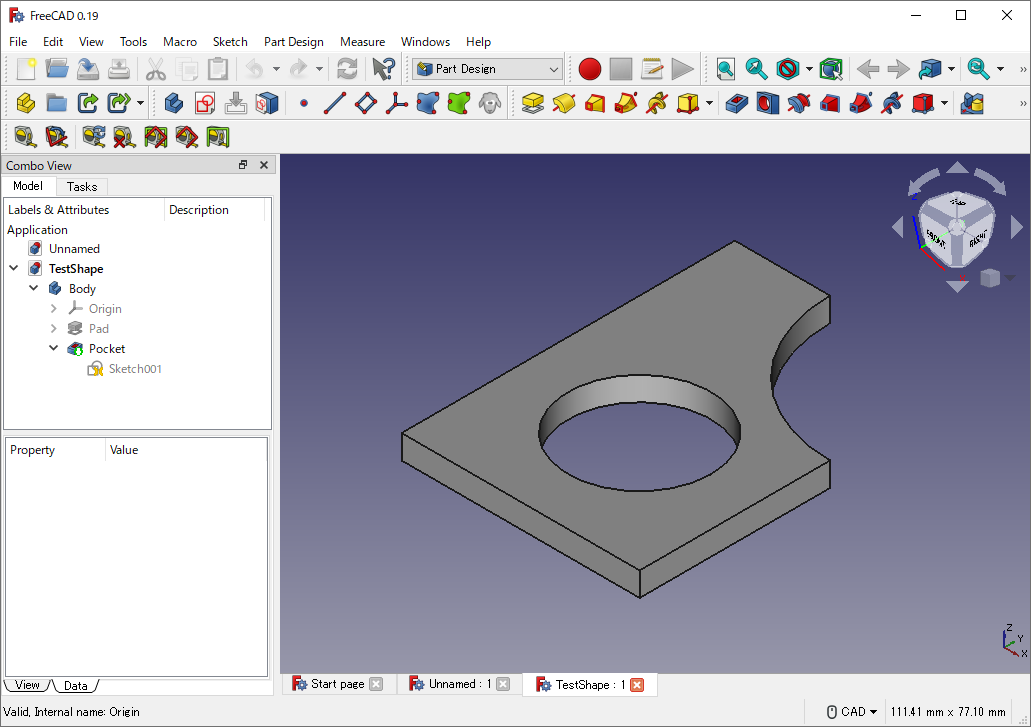
上記の操作を行うと次のようなソースコードが Python コンソールに表示されました(読みやすいようにコメントを補っています)。
# FreeCAD ファイルの読み込み
import FreeCAD
FreeCAD.open(u"C:/Test/TestShape.FCStd")
# App.setActiveDocument("TestShape")
# App.ActiveDocument=App.getDocument("TestShape")
# Gui.ActiveDocument=Gui.getDocument("TestShape")

# 中央に空いた穴の半径の変更
### Begin command Std_Workbench
Gui.activateWorkbench("PartDesignWorkbench")
### End command Std_Workbench
# Gui.Selection.addSelection('TestShape','Body','Pocket.Sketch001.')
# Gui.Selection.clearSelection()
import Show
ActiveSketch = App.getDocument('TestShape').getObject('Sketch001')
tv = Show.TempoVis(App.ActiveDocument, tag= ActiveSketch.ViewObject.TypeId)
ActiveSketch.ViewObject.TempoVis = tv
if ActiveSketch.ViewObject.EditingWorkbench:
	tv.activateWorkbench(ActiveSketch.ViewObject.EditingWorkbench)
if ActiveSketch.ViewObject.HideDependent:
	tv.hide(tv.get_all_dependent(App.getDocument('TestShape').getObject('Body'), 'Pocket.Sketch001.'))
if ActiveSketch.ViewObject.ShowSupport:
	tv.show([ref[0] for ref in ActiveSketch.Support if not ref[0].isDerivedFrom("PartDesign::Plane")])
if ActiveSketch.ViewObject.ShowLinks:
	tv.show([ref[0] for ref in ActiveSketch.ExternalGeometry])
tv.hide(ActiveSketch)
del(tv)

import PartDesignGui
ActiveSketch = App.getDocument('TestShape').getObject('Sketch001')
if ActiveSketch.ViewObject.RestoreCamera:
	ActiveSketch.ViewObject.TempoVis.saveCamera()

App.getDocument('TestShape').getObject('Sketch001').setDatum(2,App.Units.Quantity('10.000000 mm'))
Gui.getDocument('TestShape').resetEdit()
App.ActiveDocument.recompute()
ActiveSketch = App.getDocument('TestShape').getObject('Sketch001')
tv = ActiveSketch.ViewObject.TempoVis
if tv:
	tv.restore()
ActiveSketch.ViewObject.TempoVis = None
del(tv)

# Gui.Selection.addSelection('TestShape','Body','Pocket.Sketch001.')
App.getDocument('TestShape').recompute()

# ファイルを別名で保存
### Begin command Std_SaveAs
Gui.SendMsgToActiveView("SaveAs")
App.getDocument("TestShape").saveAs(u"C:/Test/TestShape-changed.FCStd")
### End command Std_SaveAs
形状変更用の Python スクリプトの作成
表示されたソースコードにはGUI 表示更新などコマンドラインでの実行時に不要なコードも含まれているので、いったん FreeCAD 上でドキュメントを閉じてから、今度は逆に Python コンソールに上記のソースコードを1行ずつ入力して必要なソースコードを特定します。
不要なソースコードを取り除くと最終的に必要なソースコードは以下のようになるので、これを「Automation.py」という名前のファイルに保存します。ファイル保存時に文字コードとして「UTF-8」を選択するよう注意してください。これで実行用の Python スクリプトができあがりました。
# FreeCAD ファイルの読み込み
import FreeCAD
FreeCAD.open(u"C:/Test/TestShape.FCStd")

# 中央に空いた穴の半径の変更
App.getDocument('TestShape').getObject('Sketch001').setDatum(2,App.Units.Quantity('10.000000 mm'))
App.getDocument('TestShape').recompute()

# ファイルを別名で保存
App.getDocument("TestShape").saveAs(u"C:/Test/TestShape-changed.FCStd")
コマンドライン版 FreeCAD を使用して形状変更を実行
作成した Python スクリプトの実行にはコマンドライン版の FreeCAD である「FreeCADCmd」を使用します。例えば Windows でデフォルト位置に FreeCAD をインストールしている場合にはファイル「Automation.py」がフォルダ「C:\Test」にあるとして、コマンドプロンプトで以下のようにすると作成したスクリプトを実行できます。
C:\Test>"C:\Program Files\FreeCAD 0.19\bin\FreeCADCmd.exe" Automation.py
実行すると以下のように表示され、変更した形状がファイル「C:\Test\TestShape-changed.FCStd」に保存されます。
FreeCAD 0.19, Libs: 0.19R24276 (Git)
(c) Juergen Riegel, Werner Mayer, Yorik van Havre and others 2001-2021
FreeCAD is free and open-source software licensed under the terms of LGPL2+ license.
FreeCAD wouldn't be possible without FreeCAD community.
	#####                 ####  ###   ####
	#                    #      # #   #   #
	#     ##  #### ####  #     #   #  #   #
	####  # # #  # #  #  #     #####  #   #
	#     #   #### ####  #    #     # #   #
	#     #   #    #     #    #     # #   #  ##  ##  ##
	#     #   #### ####   ### #     # ####   ##  ##  ##

Importing project files......
Postprocessing......
形状の変更結果は以下のようになります。変更後のファイル「TestShape-changed.FCStd」では形状が非表示になっている場合があることに注意してください。モデルツリー上で形状(例では「Body」と「Pocket」)を表示状態に切り替えることで変更後の形状が表示されます。
