Stable Diffusion のインストールとテスト出力
概要
Windows のローカル下に画像生成 AI である Stable Diffusion をインストールし、テキストからの画像生成、画像からの画像生成をおこなう方法を説明します。
この記事では以下の環境を前提としています。
- OS: Windows 11
- GPU: NVIDIA GeForce GTX 1060 6GB
- Python: 3.7(以上)
また記事中で説明するように NVIDIA アカウントと Hugging Face アカウントを作成する必要があります。
CUDA の準備
CUDA Toolkit のインストール
CUDA Toolkit をダウンロードし、インストールします。今回は「cuda_11.7.1_516.94_windows.exe」を使用しました。インストーラーでのインストール後、手動で PATH に以下を追加します。
- C:\Program Files\NVIDIA GPU Computing Toolkit\CUDA\v11.7\bin
- C:\Program Files\NVIDIA GPU Computing Toolkit\CUDA\v11.7\libnvvp
以下のコマンドで正しくインストールされたかを確認します。
$nvcc -V
nvcc: NVIDIA (R) Cuda compiler driver
Copyright (c) 2005-2022 NVIDIA Corporation
Built on Wed_Jun__8_16:59:34_Pacific_Daylight_Time_2022
Cuda compilation tools, release 11.7, V11.7.99
Build cuda_11.7.r11.7/compiler.31442593_0
CUDA Deep Neural Network のインストール
CUDA Deep Neural Network (cuDNN) をダウンロードし、インストールします。ダウンロードには NVIDIA アカウントが必要なため、登録してアカウントを作成しておきます。今回は cudnn-windows-x86_64-8.5.0.96_cuda11-archive.zip を使用しました。Zip ファイルを展開後、C:\cudnn-windows-x86_64-8.5.0.96_cuda11-archive として保存し、手動で PATH に以下を追加します。
- C:\cudnn-windows-x86_64-8.5.0.96_cuda11-archive
以下のコマンドで正しくインストールされたかを確認します。
$where cudnn64_8.dll
C:\cudnn-windows-x86_64-8.5.0.96_cuda11-archive\bin\cudnn64_8.dll
Hugging Face の準備
Stable Diffusion では学習データは Hugging Face からダウンロードされます。そのため以下の手順で Hugging Face のアクセス用トークンを取得しておきます。
Hugging Face のアカウントを作成し、ログインしておく。
-
CompVis/stable-diffusion-v1-4 | Hugging Face で stable-diffusion のライセンスに合意しておく(「Access repository」をクリック)。
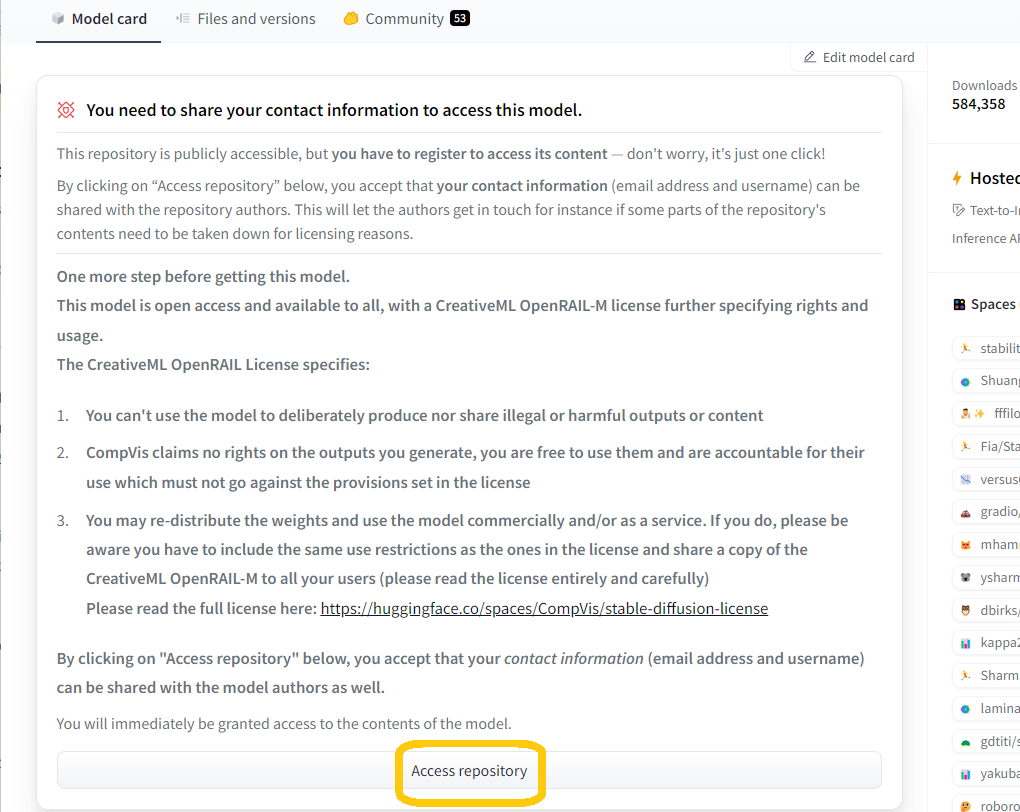
Stable Diffusion ライセンス「Access repository」をクリック -
右上のアイコン→「Settings」をクリックし、画面左側の「Access Tokens」から新しいアクセストークンを作り、それをメモしておく。
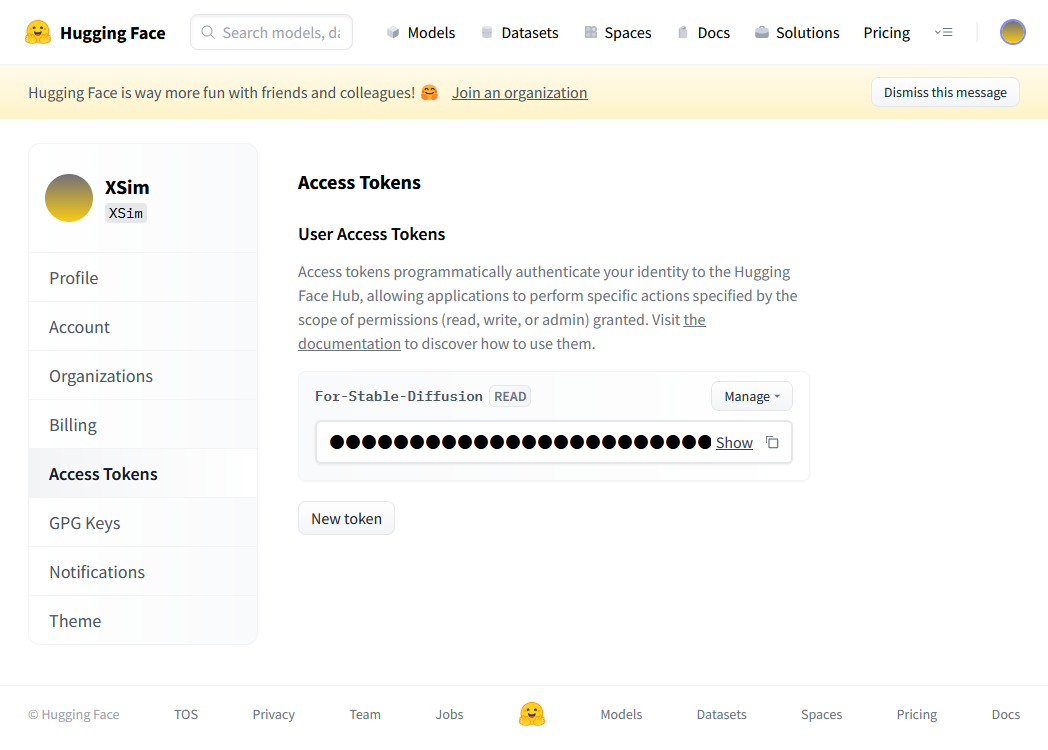
Hugging Face アクセストークンの取得
PyTorch と diffusers のインストール
PyTorch のインストールコマンドは Start Locally | PyTorch を使用して環境に合わせます。今回は以下の設定でコマンドを作成しました。
- PyTorch Build: Stable (1.12.1)
- Your OS: Windows
- Package: Pip
- Language: Python
- Compute Platform: CUDA 11.6
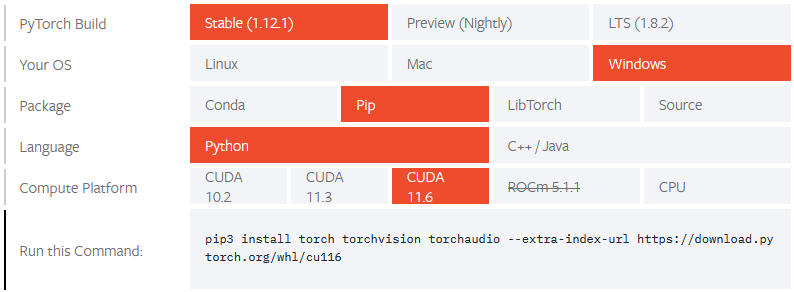
また venv を使って Python 用の仮想環境を作ることにします。
以下のコマンドで仮想環境の作成、PyTorch のインストール、Stable Difuusion のインストールを行ないます。
$python -m venv .venv
$.venv\Scripts\activate
$python -m pip install torch torchvision torchaudio --extra-index-url https://download.pytorch.org/whl/cu116
$python -m pip install --upgrade diffusers transformers scipy ftfy
インストール終了後、以下のコマンドで PyTorch のインストールを確認します。True と表示されれば問題ありません。
$python
>>import torch
>>torch.cuda.is_available()
True
PyTorch インストール時に以下のようなエラーメッセージが表示されて失敗する場合は pip のキャッシュに問題がある可能性が高いです。
$python -m pip install torch torchvision torchaudio --extra-index-url https://download.pytorch.org/whl/cu116
…(省略)…
File "D:\Test\.venv\lib\site-packages\pip\_vendor\msgpack\fallback.py", line 290, in feed
	raise BufferFull
pip._vendor.msgpack.exceptions.BufferFull
使用している pip のバージョンが 20.1 以降であれば以下のコマンドでキャッシュを削除できるので、削除後に再度 PyTorch インストールを実行してください。
$pip cache purge
使用している pip のバージョンが古い場合は以下のコマンドでpipを最新版に更新できます。
$python -m pip install --upgrade pip
テキストから画像の生成
テキストから画像を生成するには以下のような Python スクリプトを作成します。「%Hugging Faceのアクセストークン%」の部分には上記「Hugging Face の準備」の 3. で作成したアクセストークンを書き込みます。
import torch
from torch import autocast
from diffusers import StableDiffusionPipeline

use_auth_token = "%Hugging Faceのアクセストークン%"

pipe = StableDiffusionPipeline.from_pretrained(
	"CompVis/stable-diffusion-v1-4",
	revision="fp16",
	torch_dtype=torch.float16,
	use_auth_token=use_auth_token)
pipe = pipe.to("cuda")

prompt = "a photograph of an astronaut riding a horse"
with autocast("cuda"):
	image = pipe(
		prompt=prompt,          # 入力テキスト
		height=512,             # 出力画像の高さ
		width=512,              # 出力画像の幅
		num_inference_steps=50, # 画像生成に費やすステップ数
		guidance_scale=7.5,     # プロンプトと出力画像の類似度
		generator=None          # 乱数シードジェネレータ
		)["sample"][0]

image.save("text-to-image-output.png")
スクリプトを実行すると「a photograph of an astronaut riding a horse(馬に乗った宇宙飛行士の写真)」の画像が作成され、PNG 形式の画像ファイル text-to-image-output.png として保存されます。初回実行時のみ、Hugging Face から学習データのダウンロードが行われるので時間がかかることに注意してください。
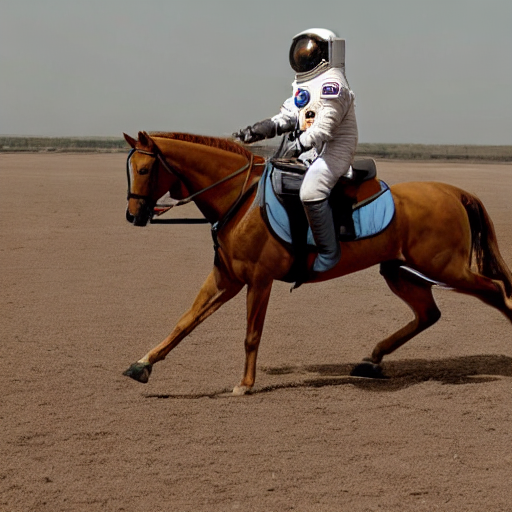
出力結果は実行するたびに変わります。
画像から画像の生成
テキストと画像から画像を生成するには以下のような Python スクリプトを作成します。
from PIL import Image
import torch
from torch import autocast
from diffusers import StableDiffusionImg2ImgPipeline

use_auth_token = "%Hugging Faceのアクセストークン%"

pipe = StableDiffusionImg2ImgPipeline.from_pretrained(
	"CompVis/stable-diffusion-v1-4",
	revision="fp16",
	torch_dtype=torch.float16,
	use_auth_token=use_auth_token)
pipe = pipe.to("cuda")

# 入力画像の準備
init_image = Image.open("text-to-image-output.png")
init_image = init_image.convert("RGB")
init_image = init_image.resize((512, 512))

prompt = "a oil paint of an astronaut riding a horse"
with autocast("cuda"):
	images = pipe(
		prompt=prompt,          # 入力テキスト
		init_image=init_image,  # 入力画像
		strength=0.75,          # 入力画像と出力画像と相違度
		num_inference_steps=50, # 画像生成に費やすステップ数
		guidance_scale=7.5,     # プロンプトと出力画像の類似度
		generator=None,         # 乱数シードジェネレータ
		)["sample"]
images[0].save("image-to-image-output.png")
カレントディレクトリに PNG 形式の画像ファイル「text-to-image-output.png」を置いてからスクリプトを実行すると、元画像を「a oil paint of an astronaut riding a horse(馬に乗った宇宙飛行士の油絵)」に書き換えた画像が作成され、PNG形式の画像ファイル image-to-image-output.png として保存されます。
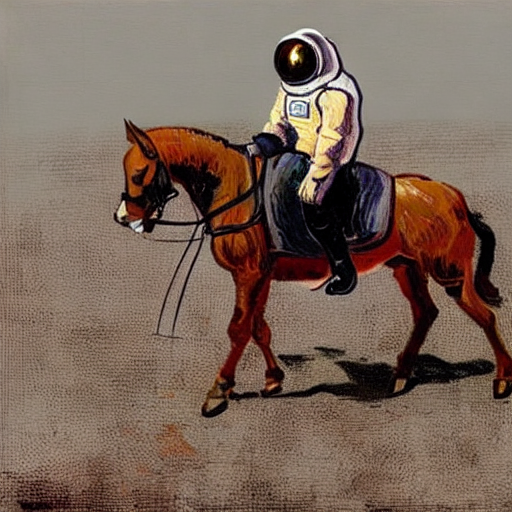
出力結果は実行するたびに変わります。
その他の情報
テキストと画像の参考
Lexica を使うとさまざまなサンプル画像から生成用テキストを確認することができます。
開発中の diffusers のインストール
Diffusers は頻繁に更新されるので pip で PyPI(https://pypi.org/project/diffusers/)からのインストールでは最新コードに追従できず、開発中の最新機能を使用できない場合があります。その場合は以下のようにして GitHub のレポジトリから強制的に最新版を再インストールすることができます。
$python -m pip install --upgrade --no-deps --force-reinstall git+https://github.com/huggingface/diffusers