FreeCAD: How to create solid from a sketch?
Steps
Click [File]-[New] in menu bar and create new document
 .
.Move to Part Design workbench

-
Select "New Sketch"
 from the toolbar and select "XY plane" in diplayed dialog. Click to create new sketch plane.
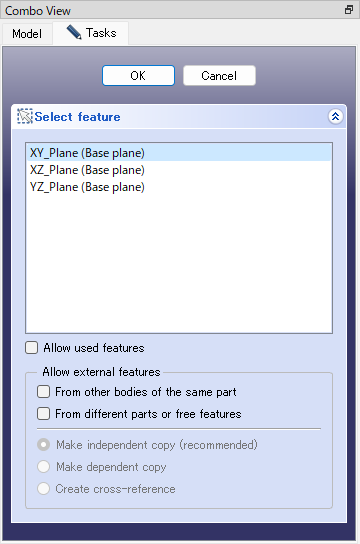
Creates sketch plane -
Select "Circle"
 from the toolbar and draw rough circle on sketch plane. When you have finished drawing, right-click to finish drawing the circle.
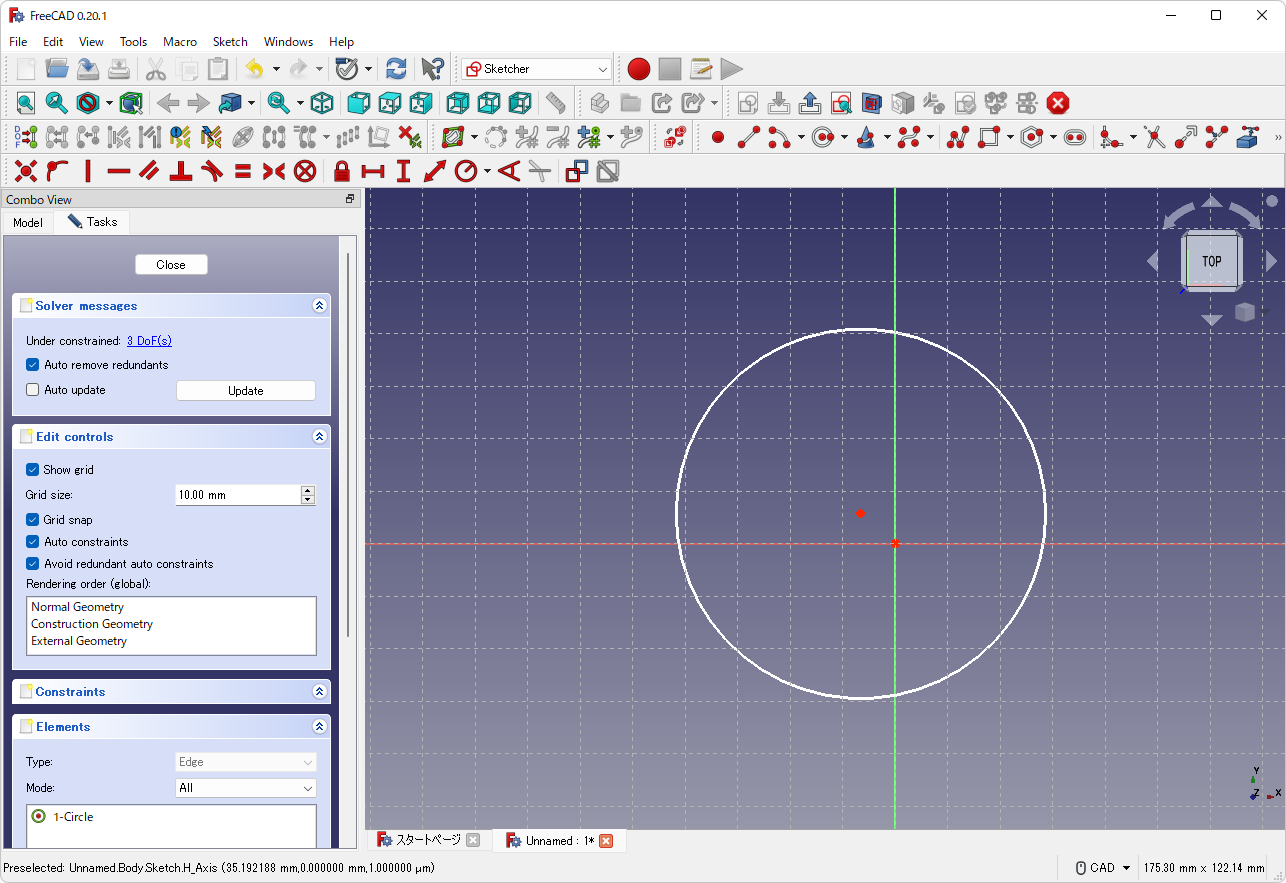
Creates circle -
Select the "Coincident"
 from the toolbar. Select the center of the circle and the origin of the sketch to make the two points coincident, and right-click to end the coincident constraint.
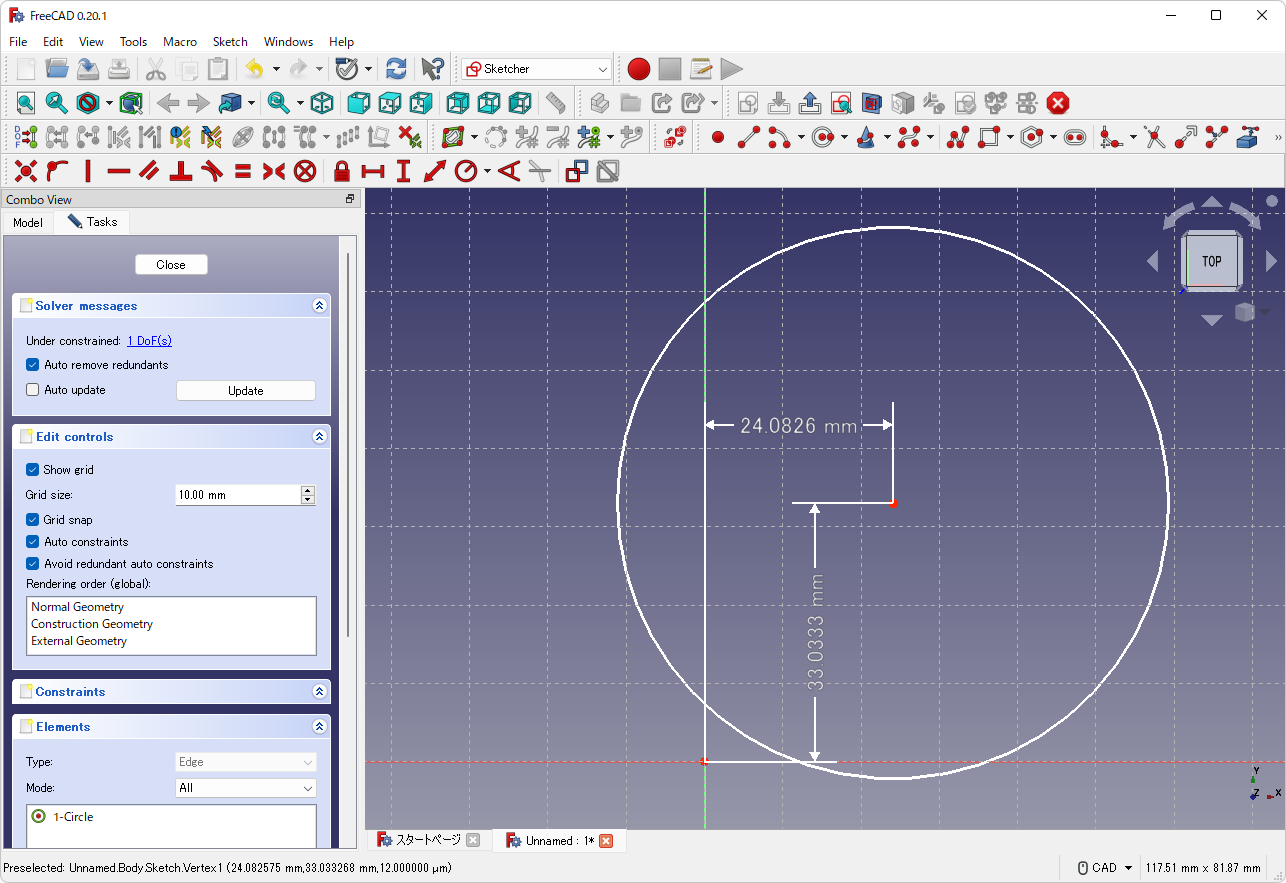
Constraints the center of the circle -
Select the "Dimension"
 from the toolbar. When you select the circle, the dimensions will be displayed, so press the M key on the keyboard to switch from diameter mode to radius mode, and click the sketch plane. Then the dimension input dialog will be displayed, so enter "20" as the radius and the circle radius will be constrained to 20mm. Right-click to end the dimensional constraint.
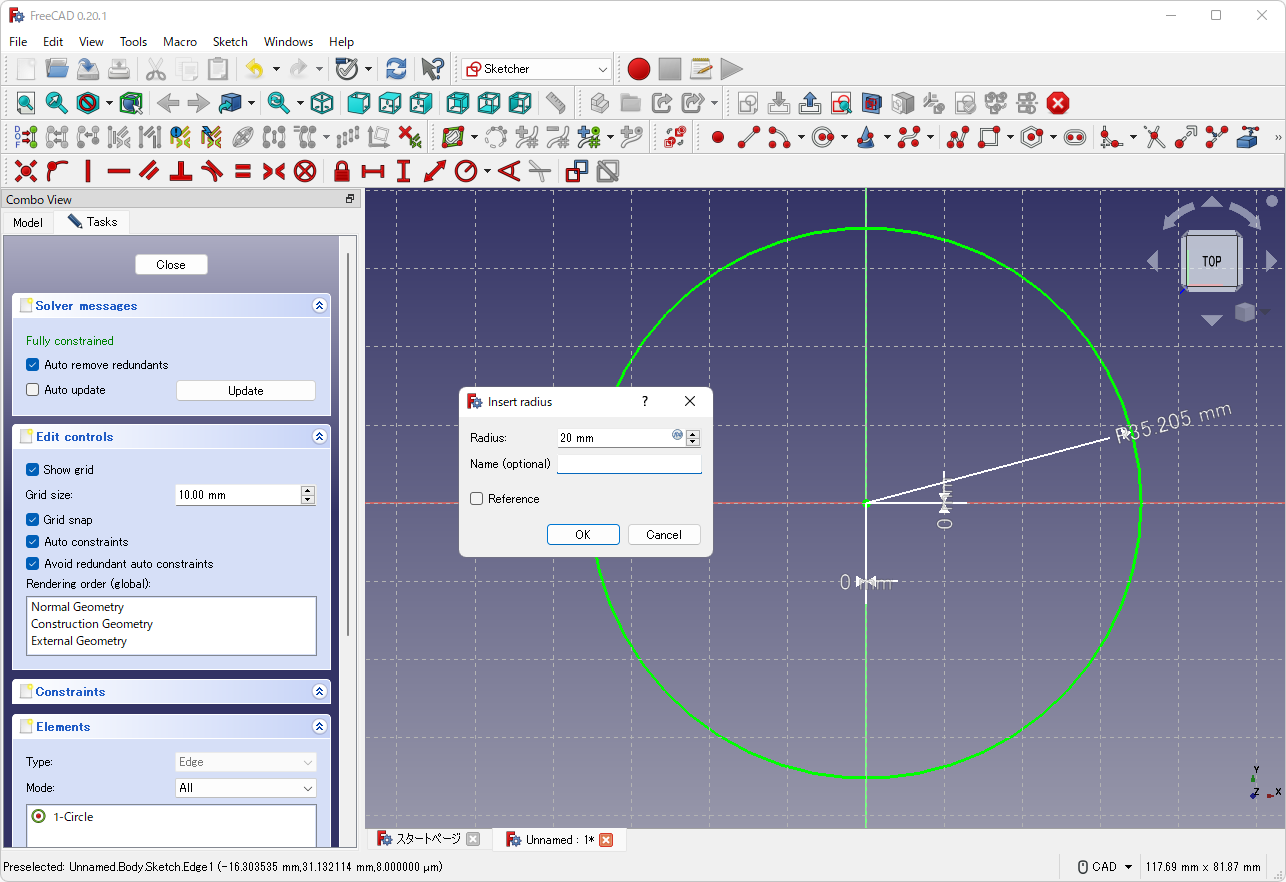
Constraints the radius Then the sketch will be full-constrained and displayed in green color.
Click on Tasks panel to exit sketch editing.
-
Selecte the created sketch on Tree View and execute "Pad"
 to start padding operation. Enter "20 mm" as Length on Tasks panle and click .
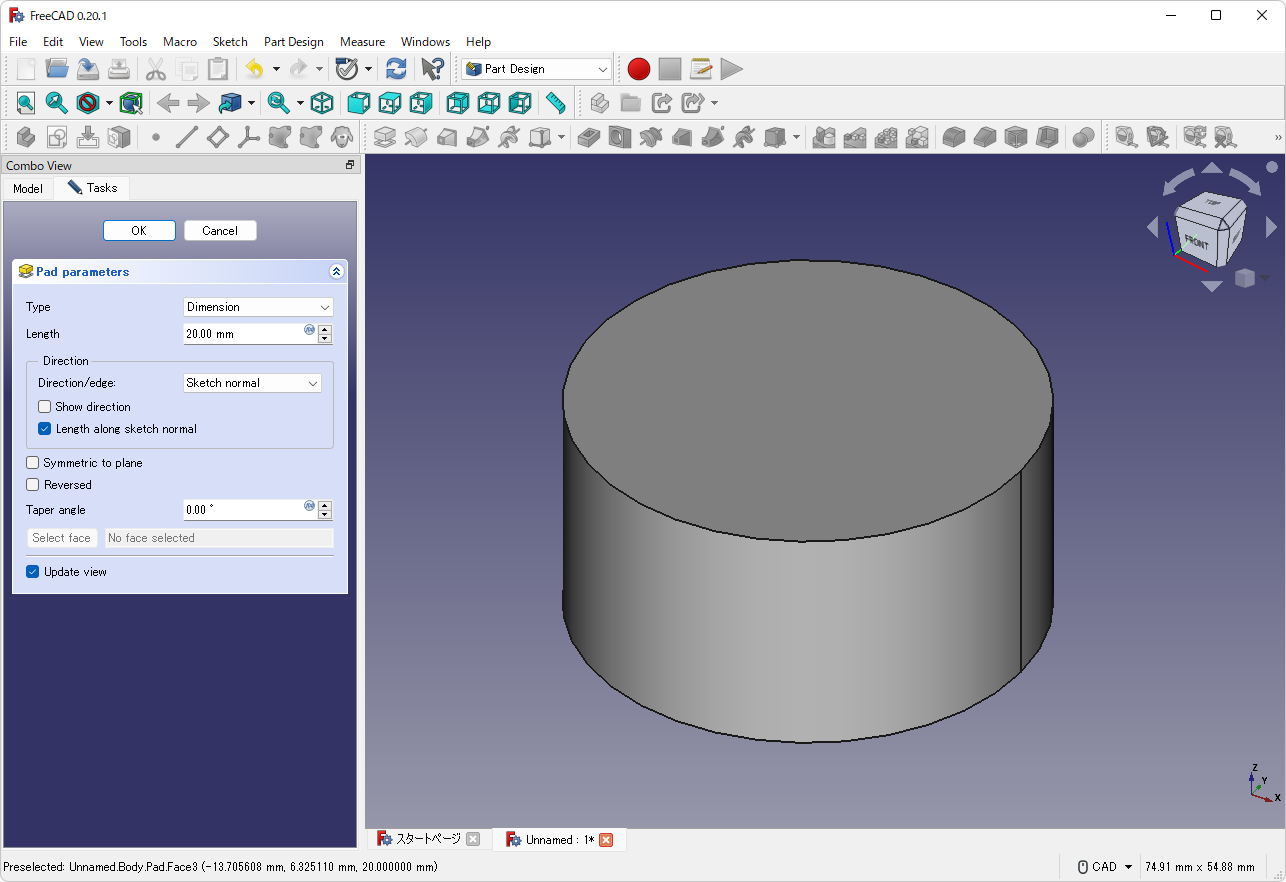
Pads a sketch
Now we have created a cylinder with radius of 20 mm, and height of 20 mm. Various solid can be created from any sketches by a similar process.